
Get Ballistic: Improving Throwing Performance in Baseball & Softball
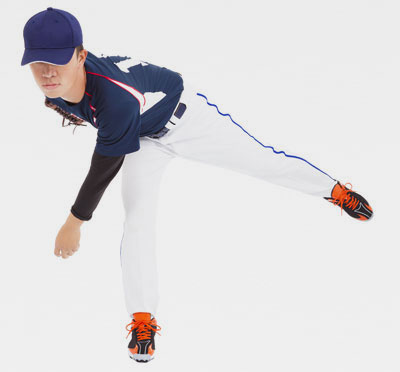
If you want to throw harder, then start NOW so you’re in shape for your first baseball or softball game. While mechanics play a significant role in how hard or far an athlete can throw the ball, recent research shows that how you train can also greatly influence the ball’s velocity. In fact, pitchers, catchers, and position players all rely on some type of strengthening program to prepare their arms for the repetitive motion associated with throwing.
Traditionally, the Thrower’s Ten, Red Sox Seven, and T’s, Y’s and I’s are commonly used programs to strengthen and condition the throwing arm. All of these training programs emphasize the development of the shoulder muscles to throw more efficiently to realize greater results.
In a recent study it was discovered that athletes who strengthen their upper body and improve their eccentric strength will realize an astonishing two miles per hour increase in the speed of their fast balls after eight weeks of training compared to those who used traditional strength training programs.
This new training strategy known as the Ballistic Six found that when athletes perform the recommended six exercises in a ballistic (quick) manner using a reverse throwing type of motion to elicit powerful stretch reflexes, they will ultimately throw the ball harder and reach new peak velocities.
Whether you are a high level pitcher or back-up softball outfielder, this type of training can help you maximize your potential as a player. Because the Ballistic Six exercises require a high level of intensity, however, athletes must be cautious when starting this strength and conditioning program. Proper warm up and stretching are vital to maximize your performance and decrease the stress on your joints, so use these three tips as a guide.
Warmup Tips to Ensure Safe Training
- Start with 10 minutes of cardiovascular exercise (e.g., biking, jogging)
- Add dynamic stretching up for the upper and lower body (e.g., walking lunge, soldier walks, high knees, butt kicks)
- Finish with targeted stretching for the shoulder capsule,(e.g., sleeper stretch – March Sports Dept. “PT Corner”)
Once you’ve warmed up, you can begin the Ballistic Six training program. All you need to get started is elastic tubing and two medicine balls – one weighing two pounds and one weighing six pounds. Both balls should be small enough to grip with one hand, but they don’t have to be the same size as the ball used in your sport. And, you should ask your local athletic trainer, physical therapist, or strength coach to work with you to master the proper technique and avoid injury.
As with any new exercise program be sure to start and progress slowly. Begin with one set of twenty repetitions performed no more than twice weekly and add one set per week. This program should be integrated in your regular weight training regimen and your return to throwing program.
6 Ballistic Exercises
- External rotation at side (tubing) – with your elbow locked at your side, use a quick and controlled motion to rotate the arm outward.
- External rotation in throwing position – with your arm in a “cocked position,” use a quick and controlled motion to rotate the arm backward.
- External rotation throws in throwing position– using a 2lb medicine ball, hold your arm in the “cocked position,” quickly throw the ball backward to a partner.
- External rotation throws in slightly closed position – using a 2lb medicine ball, from the ending position in #3, move the arm slightly forward (close your stance ½ way), then quickly throw the ball backward to a partner.
- Overhead soccer throw – Using a 6lb medicine ball, stand two feet away from a wall, and quickly throw the ball against the wall.
- Overhand throw – Using a 2lb medicine ball, stand in a split stance and throw the ball to a partner or rebounder without taking a step.
Avoid Overuse Injuries
Throwing athletes are prone to overuse injuries so be sure to follow the soreness guidelines when beginning this exercise program:
- If you are sore more than one day after training, take two days off from throwing and upper body weight training. (run, bike, lower body strength training instead)
- Upon return to training or throwing, begin with warm up exercises and stretching for your arm. If you do not experience soreness after the warm up progress with throwing or ballistic training.
- If soreness lasts more than fifteen minutes into your warm up session, stop the exercises and seek the medical advice of a Certified Athletic Trainer, Physical Therapist or Medical Doctor.